Exporting a STEP file with named surfaces from PTC Creo
When preparing geometry for numerical simulations, it is often required to mark individual surfaces in the model. These surfaces can then be used e.g. as an inlet or forces and pressures can be applied in a structural simulation.
The STEP format supports named entities. The question is: how to set the names in the CAD program? And how to achieve that they are actually stored in the STEP file? In the following, these questions are answered for the software PTC Creo.
Assign Names to Surfaces
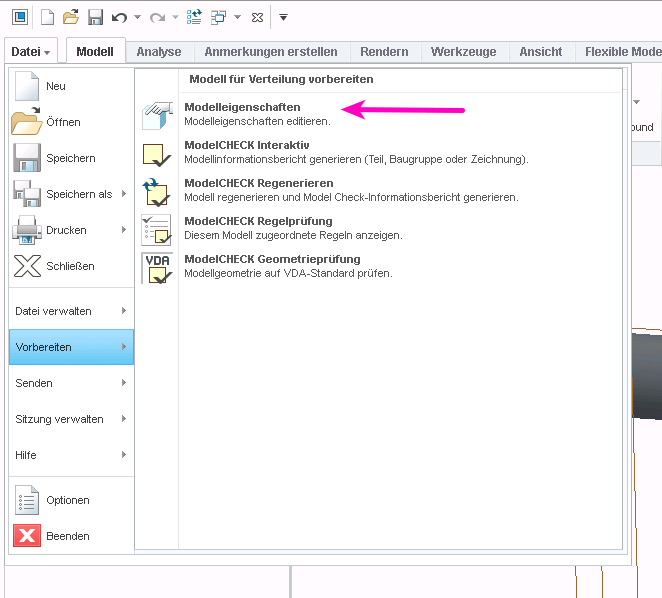
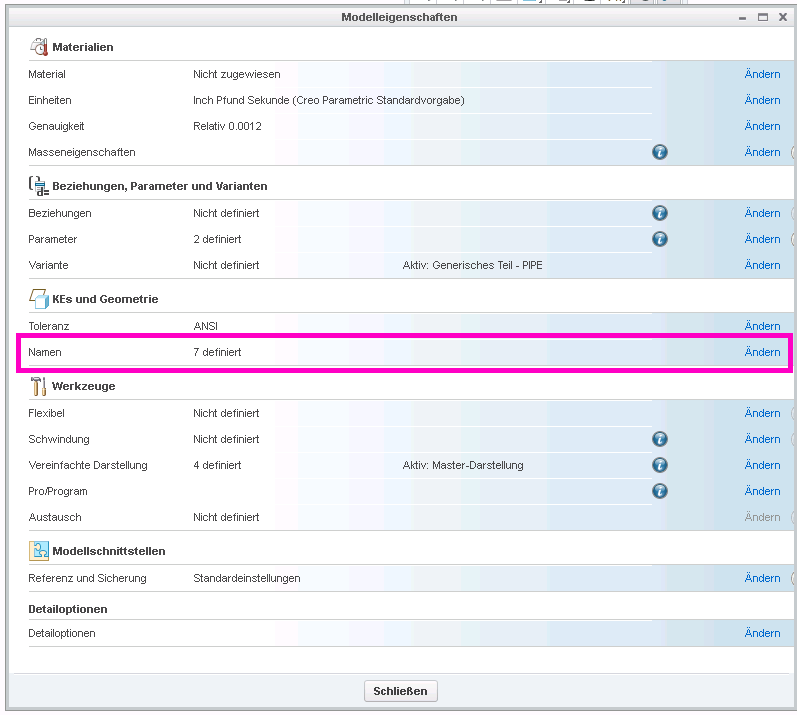
Select “File” > “Prepare” and then “Open Model Properties”, then select “Names” in the model properties dialog:
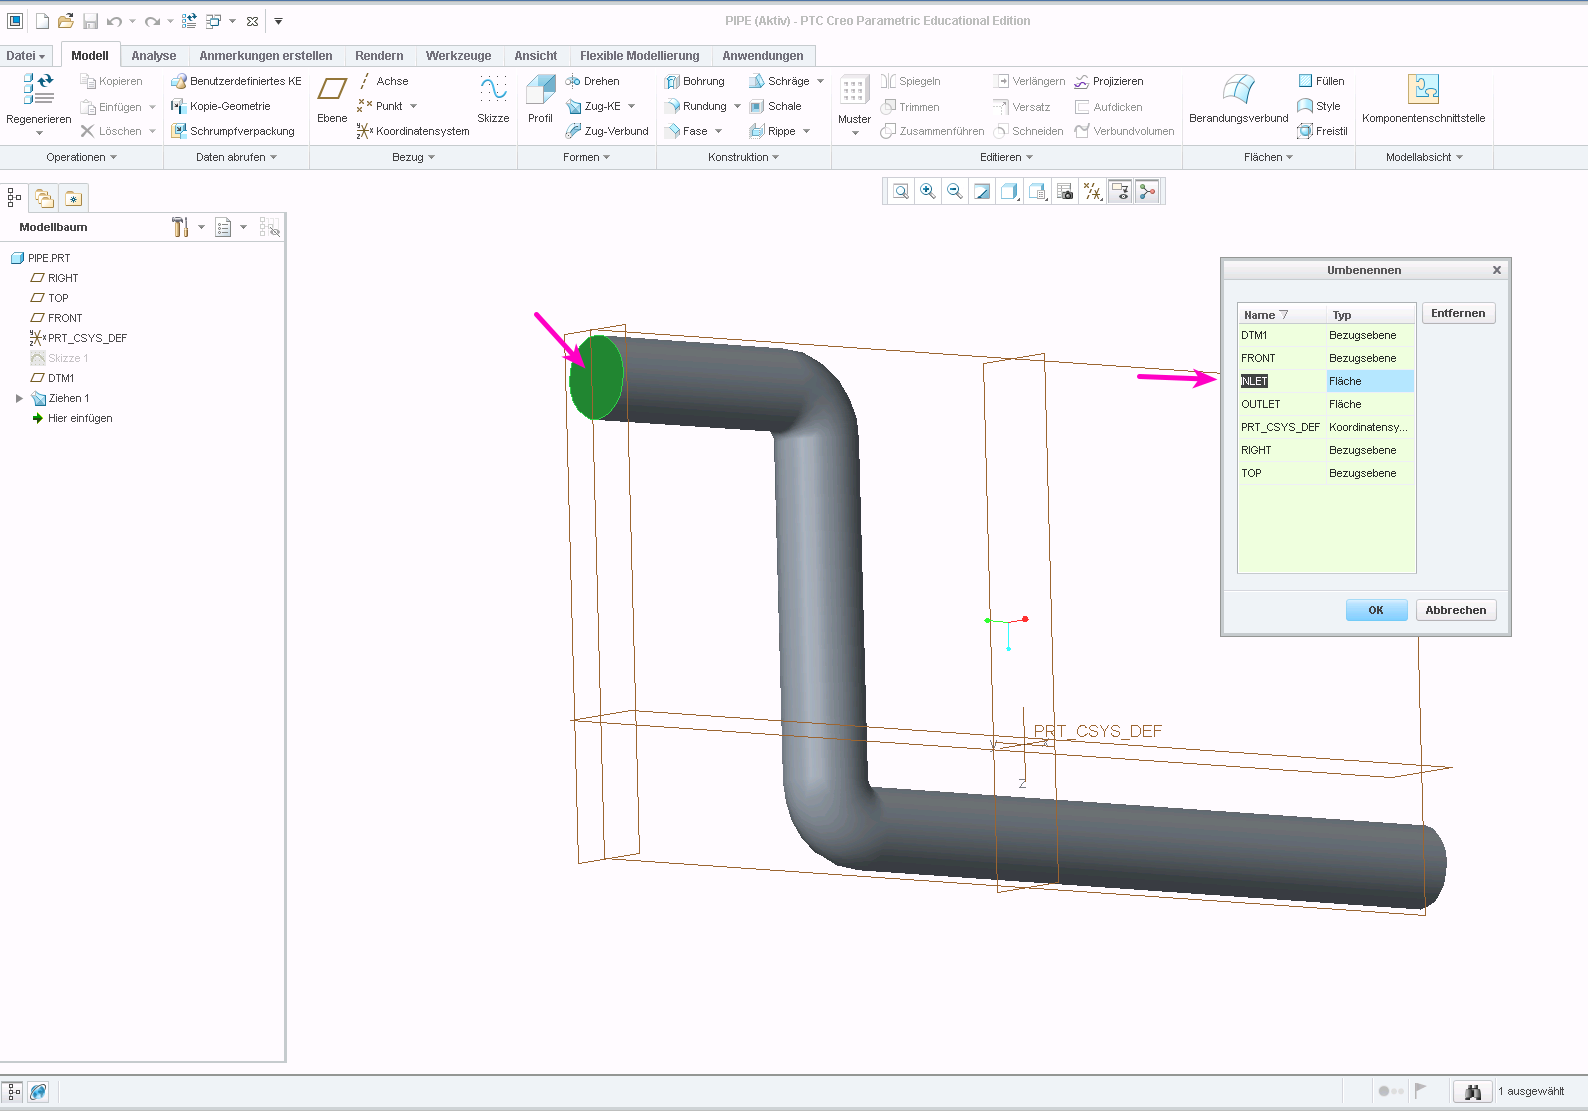
You can then select faces by clicking on them and enter a name in the dialog box:

Exporting Names in STEP File
If export a STP file with the default settings, the names will not be stored in the file. You need to change the export setup for them to be kept.
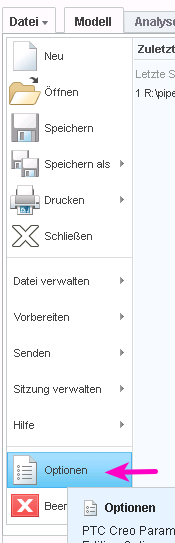
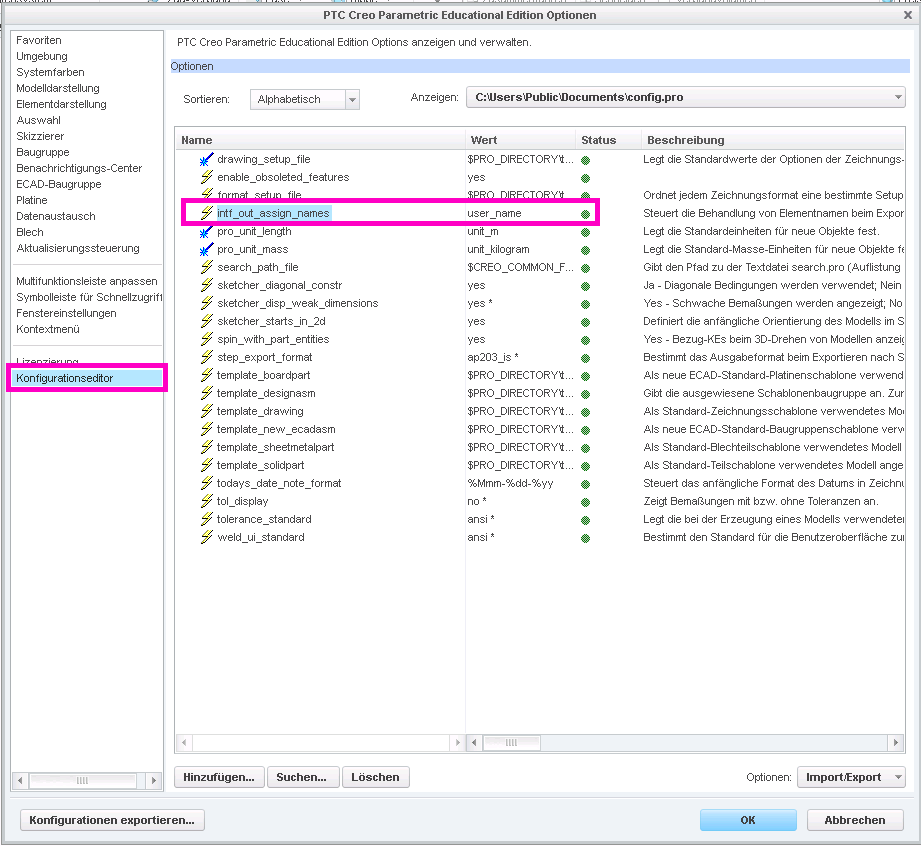
Open the settings dialog through “File” > “Options”. Then go to “Configuration Editor”. Here, you need to add the option “intf_out_assign_names” and set it to “user_name”.
Accessing the Named Entity in ISCAD
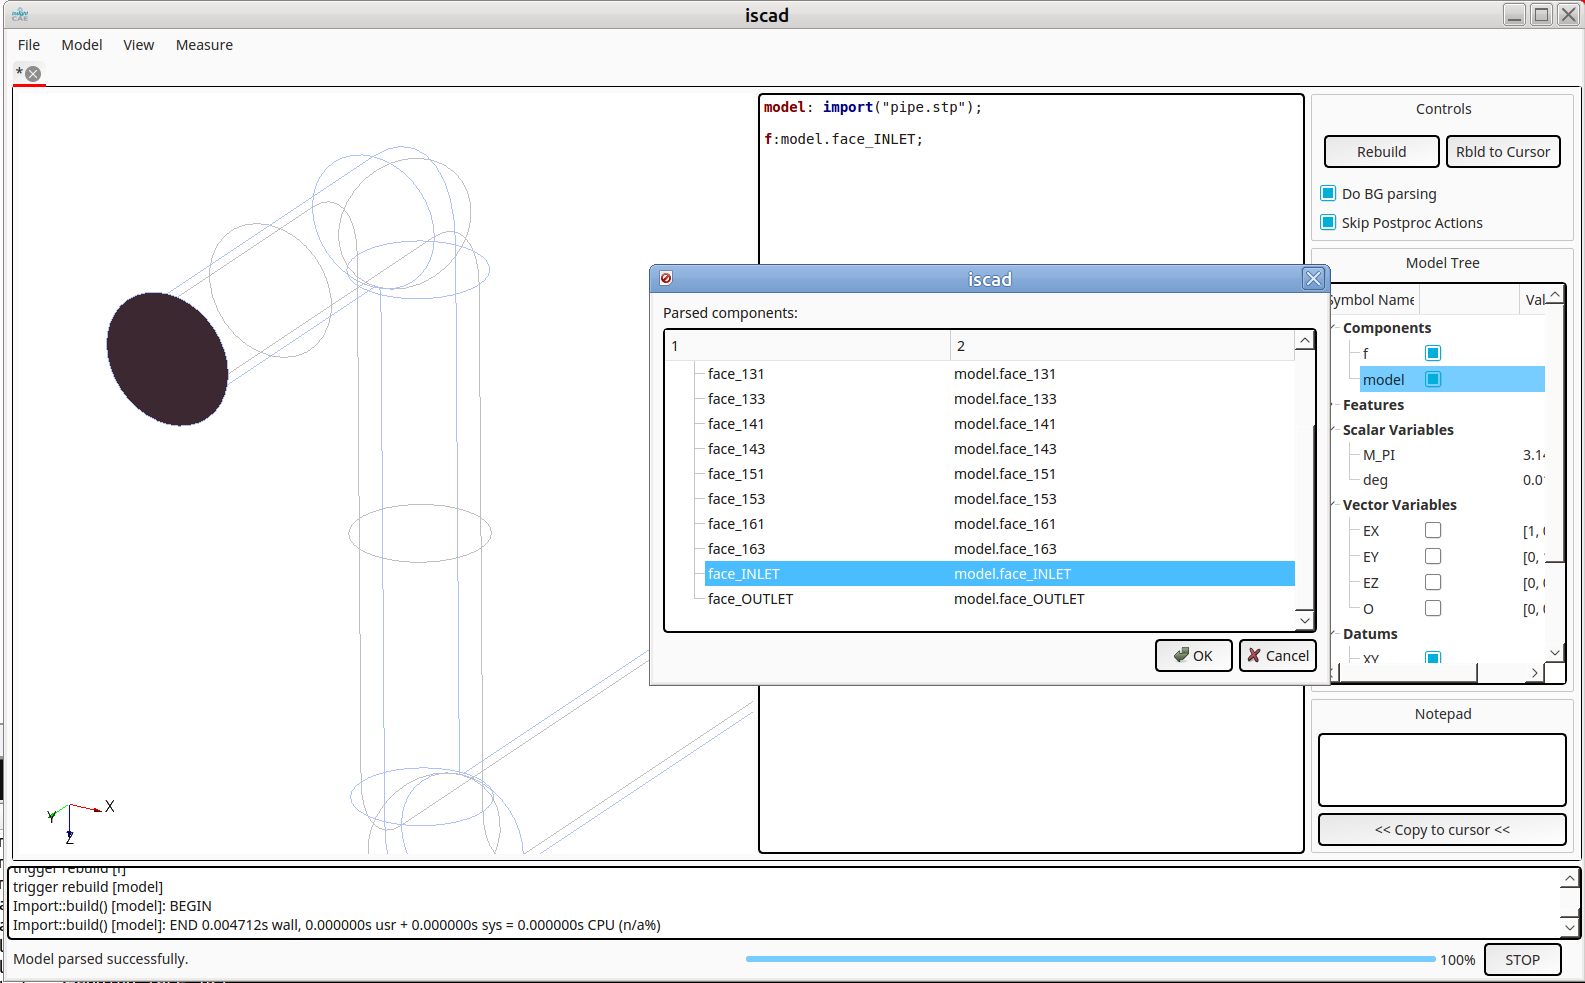
It is now possible to access the faces through the assigned names, e.g. in ISCAD. Once the STEP file is imported, its sub-entities can be explored by typing Ctrl-I (see below). The named faces appear as “face_<NAME>” int the hierarchy: